Table of Contents
ToggleThere’s something oddly peaceful about watching the sky turn orange and pink in Minecraft. Maybe it’s the brief moment before mobs start spawning, or maybe it’s just a rare chance to appreciate the blocky beauty of a world you’ve spent hours shaping. Either way, sunsets in Minecraft are more than just a visual treat, they’re a signal, a photo opportunity, and for builders, a design challenge.
This guide covers everything from the technical mechanics of Minecraft’s day-night cycle to the best shader packs for jaw-dropping sky colors in 2026. Whether you’re hunting for the perfect screenshot spot, building a sunset-themed base, or just want to freeze time at twilight using commands, you’ll find the details here. No fluff, just the specifics you need to make the most of those golden minutes before nightfall.
Key Takeaways
- Minecraft sunsets last exactly 90 seconds (ticks 12,000 to 13,800) and represent the ideal window for capturing stunning screenshots and appreciating the game’s visual design.
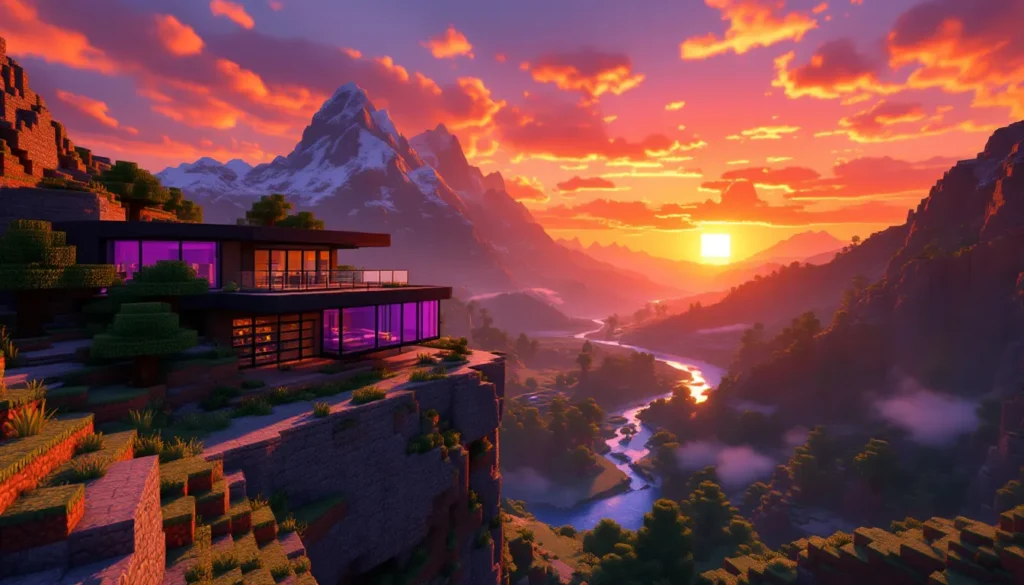
- Strategic location selection—mountaintops, cliff edges, and ocean horizons—significantly enhances sunset photography by maximizing sky visibility and framing the natural beauty of Minecraft.
- Shader packs like BSL, Complementary Reimagined, and Continuum RT dramatically transform Minecraft sunset colors, adding volumetric effects, realistic light scattering, and dynamic cloud lighting.
- Using commands like /time set 12500 combined with /gamerule doDaylightCycle false allows players to freeze time at sunset peak, enabling creative building and uninterrupted screenshot sessions.
- Silhouette structures built with dark materials like blackstone positioned against the setting sun create dramatic, memorable builds that emphasize form over detailed textures.
- Combining resource packs with shader packs gives complete control over Minecraft sunset aesthetics, letting you customize sky gradients, sun appearance, and atmospheric effects to match your creative vision.
Understanding Minecraft’s Day-Night Cycle and Sunset Mechanics
Minecraft’s day-night cycle runs on a 20-minute loop in real time. That breaks down to 10 minutes of daylight, 1.5 minutes of sunset, 7 minutes of night, and 1.5 minutes of sunrise. The transition periods, sunset and sunrise, are when the sky gradient shifts from bright blue to those warm oranges, pinks, and purples players associate with twilight.
The cycle is consistent across all game modes (Survival, Creative, Adventure) and affects mob spawning, crop growth, and certain redstone mechanics. Hostile mobs begin spawning when the light level drops below 7, which happens during the latter half of sunset. If you’re out in the open without shelter, that’s your cue to either light up the area or prepare for combat.
How Long Does a Minecraft Sunset Last?
Sunset lasts exactly 90 seconds in real time, translating to 1,800 ticks in-game (Minecraft runs at 20 ticks per second). The transition starts when the sun begins descending toward the horizon and ends when the sky fully darkens and stars appear.
The timing is precise:
- Day begins: Tick 0 (6:00 AM in-game)
- Sunset starts: Tick 12,000 (6:00 PM in-game)
- Sunset ends: Tick 13,800 (7:30 PM in-game)
- Full night: Tick 14,000 onward
This 90-second window is your prime opportunity for screenshots, time-lapses, or just soaking in the view before the world gets dangerous.
The Science Behind Minecraft’s Sky Colors
Minecraft’s sky uses a gradient system that shifts through predefined color values as the sun moves. The game doesn’t simulate real atmospheric scattering (like Rayleigh scattering in Earth’s atmosphere), but it mimics the effect well enough to feel natural.
During sunset, the sky transitions through:
- Bright blue (daytime baseline)
- Orange and yellow (sun near horizon)
- Pink and purple (sun below horizon, residual light)
- Dark blue to black (full night)
The Minecraft sun itself doesn’t change color, it remains a pale yellow-white disc. The warm tones come from the sky gradient and how light interacts with clouds and terrain. Clouds, which are hardcoded at Y-level 192 in Java Edition and around Y-level 127 in Bedrock Edition, catch the sunset colors and add depth to the scene.
Biome has zero impact on sunset colors in vanilla Minecraft. Whether you’re in a desert, taiga, or mushroom island, the sky looks identical. Shaders and texture packs (covered later) can change this, adding biome-specific sky tints or more realistic atmospheric effects.
Best Locations to Experience Stunning Minecraft Sunsets
Location matters. A sunset viewed from a cramped forest floor doesn’t compare to one seen from a mountaintop with an unobstructed horizon. The key is maximizing sky visibility and finding interesting foreground elements to frame the shot.
Mountaintop and Cliff Edge Viewpoints
High-altitude spots offer the widest view of the sky and the longest sightlines. Mountains generated in the Windswept Hills, Jagged Peaks, and Stony Peaks biomes (post-1.18 terrain generation) are ideal. These biomes push terrain up to Y-level 200+, giving you a natural vantage point.
What to look for:
- Clear western horizon: Face west (press F3, look for the direction indicator) to see where the sun sets.
- Minimal tree cover: Trees block the sky. Stony or snowy peaks work better than forested hills.
- Interesting terrain below: Valleys, rivers, or villages in the distance add depth to your view.
Cliff edges along ocean borders are another strong choice. The contrast between stone cliffs and open water creates a clean horizon line, and you can often spot the sun’s reflection on the water surface (especially with shaders).
Ocean and Beach Horizons
Ocean biomes provide the flattest, most uninterrupted horizon in Minecraft. Standing on a beach or small island and looking west gives you a pure sky-to-water gradient with zero obstruction.
Best ocean-adjacent biomes for sunsets:
- Beaches (any variant): Easy access, flat sightlines.
- Stony Shores: Rocky foreground for composition.
- Warm Ocean: Coral reefs can add color to the foreground if you’re underwater or near the surface.
For an immersive experience, build a small dock or pier extending into the ocean. Position yourself at the end, facing west, and you’ll have water on three sides, perfect for reflection-based screenshots.
Building the Perfect Sunset Viewing Platform
If natural terrain doesn’t cut it, build your own platform. This is especially useful for multiplayer servers or personal worlds where you want a dedicated spot to relax or host events.
Design tips:
- Height: Build at Y-level 150+ for minimal obstruction. Higher isn’t always better, too high and you lose terrain detail below.
- Materials: Use glass, dark oak wood, or blackstone for the platform itself. These materials don’t reflect much light and won’t distract from the sky.
- Seating: Add stairs, slabs, or campfires (unlit) as “seating” to give the space purpose.
- Direction: Orient the platform facing due west. Use a compass or F3 to confirm.
- Lighting: Avoid torches or lanterns on the platform, they’ll mess with screenshots. If you need light for safety, bury glowstone under carpets or use sea lanterns beneath glass.
Some players build circular or spiral viewing towers with multiple tiers, each offering a slightly different angle. This works well for group screenshots or if you want variety without relocating.
How to Capture and Screenshot the Perfect Minecraft Sunset
Getting a clean screenshot in Minecraft takes more than pressing F2. The difference between a decent shot and a great one comes down to timing, camera position, and knowing which settings to tweak.
Camera Settings and Angles for Optimal Screenshots
Field of View (FOV): Default FOV is 70. For landscape shots, bump it to 80–90 to capture more sky and horizon. Go above 100 and you’ll get fisheye distortion, which can work for dramatic effect but feels unnatural for most sunset compositions.
Render Distance: Set this as high as your hardware allows (12–32 chunks). A distant horizon with visible terrain or structures adds scale. If performance tanks, lower other settings (particles, smooth lighting) before sacrificing render distance.
Hide the HUD: Press F1 to remove the hotbar, health, and hunger bars. This gives you a clean frame. Press it again to bring the HUD back.
Third-Person View: Press F5 twice to enter front-facing third-person mode. This lets you include your character or a build in the foreground while keeping the sunset in the background. Useful for storytelling shots or showing off a skin.
Camera tilt: Minecraft doesn’t have native tilt controls, but you can angle your view by looking up or down. For sunsets, aim slightly above the horizon to emphasize the sky, or slightly below to include more terrain.
Timing is everything. Start watching the sky around tick 12,000 (6:00 PM). The most vibrant colors appear roughly 30–45 seconds into the sunset, when the sun is halfway below the horizon. By tick 13,500, the colors start fading to purple and dark blue. Set up early and spam F2 if needed, you can delete extras later.
Using Shaders to Enhance Sunset Visuals
Vanilla Minecraft sunsets are fine, but shaders make them spectacular. Shaders add dynamic lighting, realistic shadows, and atmospheric effects like lens flares, god rays, and volumetric clouds.
Top shader packs for sunset photography (2026):
- BSL Shaders: Balanced performance and visuals. Sunsets have warm tones and soft cloud lighting.
- Complementary Shaders (Reimagined/Unbound): Highly customizable. Tweak sunset intensity, cloud height, and color grading in the shader settings menu.
- Continuum RT: Raytraced lighting for high-end GPUs (RTX 3070+). Sunsets look photorealistic, with accurate light bounce and reflections.
- Sildur’s Vibrant Shaders: Great for mid-range hardware. Enhances sky colors without heavy performance hits.
Shaders are Java Edition–exclusive and require OptiFine or Iris (with Sodium for better FPS). Bedrock Edition has limited shader support, though some RTX packs offer similar effects on compatible hardware.
Screenshot workflow with shaders:
- Install OptiFine or Iris.
- Drop the shader .zip file into the
shaderpacksfolder. - In-game, go to Options > Video Settings > Shaders and select your pack.
- Open Shader Options (button in the shader menu) and tweak sunset colors, bloom, and lens flare intensity.
- Position your shot, wait for the right moment, press F1 to hide HUD, and hit F2.
Screenshots are saved in .minecraft/screenshots as PNG files. For higher resolution, increase your game window size or use mods like Screenshot to Clipboard for quick editing.
Enhancing Minecraft Sunsets with Shaders and Texture Packs
Shaders handle lighting and atmosphere. Texture packs (resource packs) change the actual textures of blocks, items, and, critically for sunsets, the sky and sun itself. Combining both gives you full control over how twilight looks in your world.
Top Shader Packs for Realistic Sunsets in 2026
BSL Shaders v8.2+
Still one of the most popular picks for good reason. BSL balances performance and visuals, running smoothly on mid-range GPUs (GTX 1660, RTX 3050, or equivalent). Sunsets lean warm, oranges and pinks dominate, and clouds catch light beautifully. Customization is deep: you can adjust sunset duration, sky brightness, and even add aurora effects for variety.
Complementary Reimagined v5.1+
A fork of the original Complementary Shaders, this version focuses on artistic realism. Sunsets are more saturated than BSL, with purples and magentas mixing into the orange gradient. It also adds volumetric fog that thickens during twilight, creating a moody, atmospheric vibe. Performance is moderate, expect 60+ FPS on an RTX 3060 or RX 6600 XT at 1080p.
Continuum RT 2.1 (Raytraced)
For high-end rigs only (RTX 3080+ recommended). Continuum RT uses path tracing to simulate real light behavior. Sunsets look photorealistic, with accurate color gradients and light scattering. The sun casts volumetric rays through clouds and trees, and water reflects the sky with near-perfect accuracy. Framerate hovers around 40–60 FPS at 1080p even on top-tier hardware, so this is for screenshot sessions, not survival gameplay.
Sildur’s Vibrant Shaders v1.50+
Best for older or lower-spec hardware (GTX 1050 Ti, integrated graphics). Sildur’s enhances sky colors without heavy shadow or lighting calculations. Sunsets are bright and colorful, almost cartoonish compared to BSL or Continuum, but the pack runs at 100+ FPS on modest setups. There’s also an “Extreme” version for beefier PCs that adds godrays and better reflections.
Chocapic13’s Shaders v9+
Multiple performance tiers (Lite, Medium, High, Extreme). The High and Extreme versions produce stunning sunsets with deep color saturation and realistic cloud lighting. Toaster Edition exists for integrated graphics but sacrifices most visual upgrades.
Best Texture Packs for Enhanced Sky Colors
Resource packs change the sky texture itself, the gradient, the sun, the moon, and stars. Pairing a good texture pack with shaders multiplies the effect.
Vanilla Tweaks (Custom Sky Module)
A modular pack where you pick specific features. The custom sky module replaces the vanilla sky with higher-resolution gradients and more color variety. It’s subtle but noticeable, especially during sunset. Fully compatible with most shaders.
PureBDcraft (Sphax)
A cartoony, high-contrast pack that makes sunsets more vibrant. The sun itself is larger and more stylized, and the sky gradient uses bolder oranges and reds. Works best without shaders or with minimal shader packs, heavy shaders override much of the sky texture.
Faithful 64x
Doubles vanilla resolution without changing the art style. The sky and sun look sharper, and sunset colors blend more smoothly. Pairs well with any shader pack.
Umsoea R (Realistic)
A photorealistic pack that overhauls the sky with real-world cloud textures and color gradients. Sunsets look like actual photographs. Heavy on VRAM (expect 4GB+ usage at 512x resolution), but the results are stunning. Best paired with Continuum RT or BSL for maximum realism.
Installation Guide for Shaders and Resource Packs
For Java Edition (1.20+):
- Install OptiFine or Iris:
- OptiFine: Download from optifine.net. Run the .jar installer and select your Minecraft version. Launch the OptiFine profile from the Minecraft launcher.
- Iris: Download from irisshaders.net. Requires Fabric loader. Install Fabric, drop Iris and Sodium .jar files into the
modsfolder, launch Fabric profile.
- Download Shader Pack:
Find your chosen shader (BSL, Complementary, etc.) from the developer’s site or trusted sources like CurseForge. Download the .zip file, don’t extract it.
- Install Shader Pack:
- Open Minecraft, go to Options > Video Settings > Shaders (OptiFine) or Options > Shaders (Iris).
- Click “Open Shader Pack Folder.”
- Drop the .zip file into this folder.
- Return to the game, select the shader from the list.
- Download Resource Pack:
Same sources, developer sites, CurseForge, Planet Minecraft. Download as .zip.
- Install Resource Pack:
- In-game, go to Options > Resource Packs.
- Click “Open Resource Pack Folder.”
- Drop the .zip file in.
- Back in-game, move the pack from Available to Selected.
- Click Done. The game will reload with the new textures.
For Bedrock Edition:
Shader support is limited. RTX-capable devices (Windows 10/11 with RTX GPUs) can use official RTX packs like “Vanilla RTX” or community packs from the Minecraft Marketplace. Resource packs install via Settings > Storage > Resource Packs > Import.
Most players serious about sunset photography and visual customization stick with Java Edition due to broader modding support.
Building Sunset-Themed Structures and Landscapes
Designing builds that complement or mimic sunset colors turns a good base into a memorable one. The goal is to either enhance the natural twilight palette or create structures that look best when framed against a setting sun.
Designing Sunset Color Palettes for Your Builds
Sunset hues range from warm oranges and reds to cool purples and pinks. Translating those into Minecraft blocks takes some experimentation, but certain materials nail the vibe.
Warm tones (orange, red, yellow):
- Terracotta variants: Orange, red, yellow, and white terracotta. Glazed versions add patterns.
- Concrete: Orange, red, yellow, pink. Sharp colors, modern aesthetic.
- Copper blocks: Weathered and exposed copper shift toward teal, but raw and waxed copper give warm orange-brown tones.
- Wood: Acacia (orange-brown), jungle (pink-brown), dark oak (deep brown for contrast).
- Nether blocks: Red nether bricks, nether wart blocks (deep red), crimson planks (magenta-red).
Cool tones (purple, pink, blue):
- Concrete: Magenta, purple, pink, light blue.
- Wool: Same colors as concrete, but softer texture.
- Purpur blocks: Naturally purple, found in End Cities or crafted from popped chorus fruit.
- Stained glass: Magenta, pink, orange, and red glass catch sunset light and glow beautifully.
Neutral/accent blocks:
- Blackstone, deepslate, dark prismarine: Use these for outlines or shadows to make bright colors pop.
- Quartz, white concrete, bone blocks: Highlights and contrasts.
Example palette:
A sunset-themed house might use orange terracotta for walls, red nether brick for the roof, acacia wood for beams, and magenta stained glass for windows. The dark oak or blackstone foundation grounds the build and stops it from looking too bright.
Creating Silhouette Structures for Dramatic Effect
Silhouette builds are designed to be backlit by the sunset, showing only their dark outline against a colorful sky. Think statues, towers, or archways that frame the horizon.
Design principles:
- Simple, recognizable shapes: Silhouettes lose detail, so complex builds don’t read well. Go for bold forms, castles, lighthouses, monuments, giant trees, or abstract sculptures.
- Tall and vertical: Height increases visibility against the sky. Towers, obelisks, and spires work best.
- Dark materials: Blackstone, obsidian, deepslate, dark oak, coal blocks. You want zero light emission and maximum contrast.
- Positioning: Build on the western side of your base or viewing area so the structure is between you and the setting sun.
Example projects:
- Lighthouse: Tall blackstone tower on a coastal cliff. At sunset, it’s a stark black shape against orange sky.
- Arch or gateway: Build a large stone arch (blackstone or deepslate) on a mountain ridge. Stand on one side at sunset and shoot through the arch, the sky fills the frame.
- Statue or monument: A large figure (player character, animal, dragon) built from dark blocks. Position it on a hilltop and photograph from below at sunset.
Silhouette builds don’t need interiors or detailed textures. They’re purely about shape and placement.
Using Commands to Control Time and Create Permanent Sunsets
Creative mode and commands let you freeze time at sunset or speed through the day-night cycle for rapid iteration. This is essential for building, screenshot sessions, or setting up cinematic scenes.
Essential Time Commands Every Player Should Know
Check current time:
/time query daytime
Returns the current tick count (0–24,000). Useful for confirming you’re at the right moment.
Set time to sunset start:
/time set 12000
Instantly jumps to 6:00 PM in-game, the beginning of sunset.
Set time to sunset peak (best colors):
/time set 12500 to /time set 13000
Trial and error will tell you which exact tick looks best in your world with your shaders. 12750 is a common sweet spot.
Set time to sunrise:
/time set 23000
Sunrise mechanics mirror sunset, so this gives you a similar color palette with eastern orientation.
Stop time advancement:
/gamerule doDaylightCycle false
Freezes the day-night cycle at the current tick. The sun, moon, and sky stop moving. Run /time set 12500 then this command to lock in a permanent sunset. Re-enable with /gamerule doDaylightCycle true.
Speed up time (for testing):
/time add 1000
Advances time by 1,000 ticks (~50 seconds). Repeat to fast-forward through day or night.
Note: Commands require cheats enabled (Creative mode or “Allow Cheats” toggled on in world settings). On multiplayer servers, you need operator permissions.
Creating Custom Sunset Experiences with Command Blocks
Command blocks let you automate time changes or trigger effects tied to sunset. Common uses include event triggers, ambiance systems, or timed challenges.
Basic setup:
- Get a command block:
/give @s command_block - Place it and right-click to open the interface.
- Enter your command (e.g.,
/time set 12500). - Set the block to Repeat and Always Active for continuous effects, or Impulse for one-time triggers.
Example system: Permanent sunset loop
Set up a chain of command blocks:
- Block 1 (Repeat, Always Active):
/time set 12500
Locks time at sunset peak.
2. Block 2 (Repeat, Always Active, delay): /gamerule doDaylightCycle false
Ensures the cycle doesn’t re-enable.
This keeps your world in perpetual twilight. Mobs will spawn as if it’s night, so light up your area or run /gamerule doMobSpawning false if you want peaceful sunset vibes.
Example system: Timed sunset event
Use a redstone clock to trigger:
- Block 1 (Impulse):
/time set 12000(start sunset) - Block 2 (Chain, delay 90 seconds):
/say The sun has set. - Block 3 (Chain):
/time set 18000(jump to midnight)
This creates a scripted sunset event for adventure maps or roleplay servers.
Advanced: Custom sky colors with Datapacks
Datapacks (Java Edition 1.16+) let you override biome properties, including sky and fog colors. By editing biome JSON files, you can set custom RGB values for the sky during sunset. This is beyond commands but pairs well with time-control setups for totally unique visuals. Many community-created datapacks and guides exist for this.
Minecraft Sunset Photography Tips and Creative Ideas
Photography in Minecraft is part technical skill, part creative vision. The best shots come from experimentation, but a few principles apply across the board.
Composing Cinematic Shots with Environmental Elements
Rule of thirds: Imagine your screen divided into a 3×3 grid. Place the horizon along the bottom third line, not dead center. Position key elements (sun, structures, characters) at grid intersections. This creates balance and visual interest.
Leading lines: Use roads, rivers, fences, or rows of trees to draw the viewer’s eye toward the sunset. A path winding toward the horizon, with the sun at the end, gives the shot depth and direction.
Foreground interest: Empty sky is boring. Include something in the foreground, a tree branch, a building corner, your character, an animal. This adds layers and context.
Framing: Shoot through windows, archways, or between trees to “frame” the sunset within your shot. This focuses attention and adds composition complexity.
Reflections: Water, ice, and (with shaders) wet stone reflect the sky. Position yourself so the sunset is mirrored in a lake, ocean, or pond. Symmetry shots are visually striking.
Mobs and animals: A cow or horse grazing in front of a sunset adds life and scale. Passive mobs won’t run away if you approach slowly in Survival. In Creative, use spawn eggs to place animals exactly where you want them.
Weather effects: Rain or snow during sunset (rare but possible) creates unique shots. Rain with shaders adds mist and light scatter. Snow softens colors and adds white foreground elements.
Player poses: Use emotes (Bedrock Edition) or position your character doing something, sitting on a ledge, standing with a sword raised, riding a horse. Tells a story beyond just landscape.
Time-Lapse Techniques for Sunset Transitions
Time-lapses capture the full sunset, from blue sky to twilight to night, in a compressed video. This requires screen recording software and some post-processing.
Tools:
- OBS Studio (free, cross-platform): Records Minecraft gameplay at high resolution.
- Replay Mod (Java Edition): Lets you record camera paths and replay them from any angle. Perfect for smooth, cinematic time-lapses.
- Video editing software: DaVinci Resolve (free), Premiere Pro, or even Windows Photos for basic speed-up.
Process:
- Position your camera (first- or third-person) with the sunset in frame.
- Run
/gamerule doDaylightCycle trueto let time flow naturally. - Start recording at tick 11000 (late afternoon) and let it run through tick 14000 (full night). About 3 minutes real-time.
- In editing, speed up the footage 10–20x. The sun will visibly move, and the sky will shift colors.
- Add ambient music or sound (C418’s Minecraft OST works well).
Replay Mod method:
- Install Replay Mod (requires Fabric or Forge).
- Play through a sunset in-game. Replay Mod auto-records all movements.
- Open the Replay Viewer, load your recording.
- Set up a camera path: click keyframes at different positions/angles during the sunset.
- Render the path as a video. Replay Mod outputs high-res MP4 files.
- Speed up in editing if desired.
Time-lapses work especially well with shaders, volumetric clouds moving, light rays shifting, stars appearing. The Minecraft sun rises in the east and sets in the west, mirroring real-world behavior, so your camera orientation matters. Facing west captures the sun sinking: facing east during sunrise captures it rising.
Some players build time-lapse “studios”, rotating platforms or minecart tracks that slowly circle a build as the sun sets. This creates a dynamic, 360-degree reveal.
Conclusion
Minecraft sunsets are one of those small details that remind you why you keep coming back to the game. Whether you’re grabbing a quick screenshot, setting up a permanent twilight world with commands, or spending hours tweaking shader settings for the perfect orange glow, there’s always another angle to explore.
The mechanics are straightforward, 90 seconds, tick 12000 to 13800, same sky gradient everywhere, but the creative possibilities stretch as far as your render distance. Build a silhouette tower. Freeze time at golden hour. Pair a shader pack with a custom texture and watch the sky turn into something out of a painting.
If nothing else, next time the sun starts dipping toward the horizon in your world, take a second to watch it. You’ve got a minute and a half before the mobs show up anyway.