Table of Contents
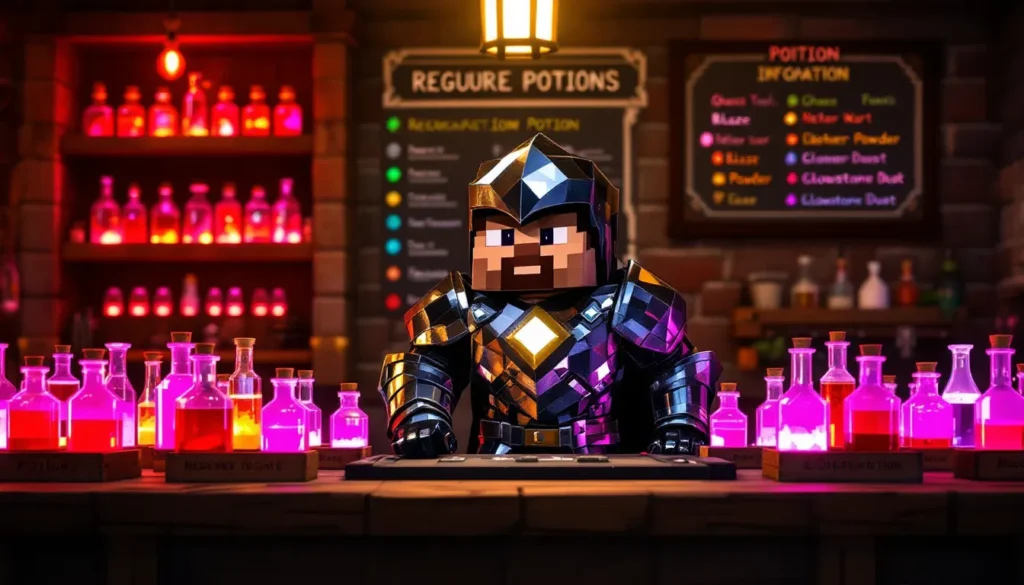
ToggleMinecraft’s combat and survival systems are brutal without proper preparation. Running into a Wither or navigating deep caves with half a health bar is a recipe for disaster. That’s where the regeneration potion comes in, a lifesaving brew that restores health over time and can mean the difference between victory and a death screen.
Whether you’re gearing up for a boss fight, exploring dangerous biomes, or holding your ground in PvP, mastering the regen potion minecraft recipe is essential. This guide walks through everything: gathering ingredients, brewing each variant, and deploying them effectively in different scenarios. By the end, you’ll be crafting Regeneration II potions in bulk and using them like a seasoned alchemist.
Key Takeaways
- Regeneration potion Minecraft comes in two primary tiers—Regeneration I heals slower over 45 seconds, while Regeneration II delivers faster healing in just 22 seconds, making each ideal for different combat situations.
- Ghast tears are the critical bottleneck ingredient for brewing regeneration potions and drop exclusively from ghasts in the Nether, requiring dedicated farming with proper equipment and strategy.
- Regeneration II is essential for boss fights like the Ender Dragon and Wither due to burst healing capability, while extended Regeneration I is superior for exploration and long mining expeditions.
- Always brew the awkward potion base with nether wart before adding ghast tears, and never combine glowstone dust and redstone together as they cancel each other out.
- Splash and lingering regeneration potions expand versatility for multiplayer scenarios, though splash versions deliver only 75% effectiveness compared to drinking directly.
- Stacking regeneration potions with other effects like strength, resistance, and absorption creates powerful synergies that transform your survivability in dangerous encounters.
What Is a Regeneration Potion and Why You Need It
A Regeneration potion restores health continuously over a set duration. Unlike instant health potions that give an immediate heal, regeneration ticks every 2.5 seconds (50 game ticks), making it ideal for sustained fights or risky exploration where damage is inevitable.
The potion comes in two primary tiers: Regeneration I and Regeneration II. Both are invaluable, but choosing the right one depends on the situation.
Understanding Health Regeneration Mechanics
Minecraft’s health regeneration works on a tick-based system. Each tick represents 0.05 seconds in real time, and health regenerates at specific intervals depending on the effect level.
Regeneration I restores 1 health point (half a heart) every 2.5 seconds. Over its default 45-second duration, that’s 18 health points total, enough to recover from most mid-fight damage.
Regeneration II doubles the healing speed, restoring 1 health point every 1.25 seconds. The tradeoff? Duration drops to 22 seconds, but total healing jumps to roughly 17.6 health points delivered much faster.
Understanding this timing is critical. If you’re in an extended fight with moderate incoming damage, Regeneration I keeps you topped off. If you need a fast burst heal during intense combat, Regeneration II is the move.
Regeneration I vs Regeneration II: Key Differences
Here’s the breakdown:
- Regeneration I (base): 45-second duration, heals 18 HP total, slower but longer-lasting
- Regeneration II (glowstone-enhanced): 22-second duration, heals ~17.6 HP total, faster but shorter window
RegenerationI is better for exploration, cave diving, and situations where you need steady recovery without reapplying frequently. Regeneration II shines in boss fights and PvP, where those extra seconds of faster healing can save your life during a critical exchange.
You can also extend Regeneration I to 2 minutes using redstone, though this sacrifices healing speed. More on that later.
Ingredients Required to Brew Regeneration Potions
Brewing a potion of regeneration minecraft requires specific ingredients, most of which come from the Nether. Here’s the full shopping list:
- Blaze Powder (fuel for the brewing stand)
- Nether Wart (creates awkward potion base)
- Ghast Tear (primary ingredient for regeneration effect)
- Water Bottles (base containers)
Optional modifiers:
- Glowstone Dust (upgrades to Regeneration II)
- Redstone (extends duration)
- Gunpowder (converts to splash potion)
- Dragon’s Breath (converts splash to lingering)
Where to Find Ghast Tears
Ghast tears are the bottleneck. These rare drops come exclusively from ghasts, the floating, fireball-shooting mobs in the Nether.
Ghasts spawn in any Nether biome with enough open space, soul sand valleys and basalt deltas are prime hunting grounds. They have a 50% chance to drop one ghast tear on death in Java Edition (slightly lower in Bedrock).
Pro tips for farming ghasts:
- Bring a bow with Power and Infinity enchantments. Ghasts are tough to hit with melee.
- Use Fire Resistance potions. Their fireballs hurt, and lava is everywhere.
- Build a small platform in an open Nether area to increase spawn rates.
- If you’re struggling, check ruined portals and bastion remnants, they occasionally have ghast tears in chests.
Looting III doesn’t affect ghast tear drop rates, so focus on killing volume rather than enchantment optimization.
Obtaining Nether Wart and Blaze Powder
Nether Wart grows in Nether fortresses, usually in small farms near staircases. Harvest it and replant on soul sand in your base, it grows in any dimension. Each mature plant drops 2-4 warts, so a small farm supplies indefinite brewing.
Blaze Powder comes from blaze rods, dropped by blazes in Nether fortress spawners. Each rod crafts into 2 blaze powder. Stock up, you’ll need powder for both brewing fuel and crafting eyes of ender.
If you’re hitting the Nether for the first time, prioritize finding a fortress. Mark coordinates and build a safe portal room. You’ll be back often.
Step-by-Step Brewing Process
Brewing a regen potion minecraft follows a precise sequence. Skipping steps or adding ingredients out of order won’t work, Minecraft’s alchemy is strict.
Setting Up Your Brewing Stand
Craft a brewing stand using 1 blaze rod and 3 cobblestone (or blackstone). Place it in your base near chests for ingredient storage.
Right-click to open the interface. You’ll see:
- Three bottle slots at the bottom
- One ingredient slot at the top
- One fuel slot on the left (blaze powder)
Add blaze powder to the fuel slot, each powder brews 20 batches, so one load lasts a while.
Crafting the Awkward Potion Base
All effect potions start with an awkward potion. Here’s how:
- Fill 3 glass bottles with water (right-click any water source).
- Place all 3 water bottles in the brewing stand’s bottom slots.
- Add nether wart to the top ingredient slot.
- Wait for the brewing animation (20 seconds).
You now have 3 awkward potions. These are the foundation for regeneration, strength, speed, and most other effect potions.
Adding Ghast Tears for Regeneration Effect
With awkward potions ready:
- Leave the 3 awkward potions in the brewing stand (or replace them if you removed them).
- Add a ghast tear to the top ingredient slot.
- Wait for the brewing process to complete.
You now have 3 Potions of Regeneration (Regeneration I, 0:45). Drink one and watch your health bar tick back up.
That’s the base version. But you can modify it further for different situations.
Upgrading and Modifying Your Regeneration Potions
The base regeneration potion is solid, but modifications unlock serious versatility. Whether you need faster heals, longer duration, or area-of-effect support, there’s a modifier for that.
Creating Regeneration II with Glowstone Dust
Glowstone Dust amplifies potion effects. For regeneration, it doubles the healing rate but cuts duration roughly in half.
Process:
- Place your Regeneration I potions in the brewing stand.
- Add glowstone dust to the ingredient slot.
- Brew.
Result: Regeneration II (0:22) potions that heal twice as fast. Perfect for boss fights where every second counts. Players tackling the Ender Dragon often prefer Regeneration II for the burst healing during phase transitions.
Note: You can’t revert Regeneration II back to Regeneration I, so plan your upgrades carefully.
Extending Duration with Redstone
Redstone extends potion duration. Add it to Regeneration I and you get a 2-minute (1:30 in some versions) effect, great for long expeditions where reapplying isn’t convenient.
Process:
- Place Regeneration I potions in the brewing stand.
- Add redstone to the ingredient slot.
- Brew.
Result: Regeneration (Extended) potions with 2:00 duration.
Warning: Redstone and glowstone are mutually exclusive. You can have Regeneration II or extended duration, not both. Choose based on need:
- Extended for mining, exploration, and PvE.
- Regeneration II for boss fights and PvP.
Making Splash and Lingering Versions
Splash potions let you throw regeneration at allies (or yourself in a pinch). Useful in multiplayer or when you don’t have time to drink mid-fight.
Process:
- Brew your base or modified regeneration potion first.
- Add gunpowder to convert it to a splash potion.
Splash potions have 75% effectiveness compared to drinking, so factor that into healing calculations.
Lingering potions create a cloud that applies the effect over time. They’re niche but powerful for area control.
Process:
- Start with a splash potion (any tier).
- Add Dragon’s Breath (collected from the Ender Dragon’s breath attack).
Lingering potions are expensive since Dragon’s Breath is finite, but they’re excellent for multiplayer bases or supporting teammates during raids.
Best Uses for Regeneration Potions in Gameplay
Knowing when to use regeneration potions separates good players from great ones. Here’s where they shine.
Combat Situations and Boss Fights
RegenerationII is non-negotiable for major boss encounters:
- Ender Dragon: Pop Regeneration II right before phase 2 (when the dragon perches). Combined with strength potions, you can tank damage while dealing max DPS.
- Wither: Regeneration II stacks with absorption and resistance effects from golden apples. Many experienced players recommend having at least three Regeneration II potions before summoning the Wither.
- Elder Guardian: Underwater fights are brutal, and mining fatigue makes escaping tough. Regeneration I (extended) keeps health stable during prolonged engagements.
In general, use Regeneration II when burst damage is high and the fight is short. Use Regeneration I (extended) for drawn-out battles where resource efficiency matters.
Exploration and Cave Diving
Deep slate caves, ancient cities, and the Nether all benefit from extended Regeneration I. The longer duration means fewer inventory slots dedicated to healing items.
Carry 2-3 extended regeneration potions alongside food and instant health. Activate regeneration when you take significant damage but aren’t in immediate danger, it’ll top you off passively while you keep moving.
In the Nether, regeneration synergizes perfectly with Fire Resistance. Both last long enough to explore a fortress or hunt for netherite without constant reapplication. Some players running Nether survival challenges rely heavily on extended regeneration to offset constant mob pressure.
PvP and Multiplayer Strategies
PvP meta heavily favors Regeneration II. In a 1v1, the player with faster healing usually wins extended trades.
Splash potions add another layer. Throw a splash Regeneration II at your feet mid-combat for instant application without drinking animation delays. Advanced players hotkey splash potions separately from drinkables for faster access.
In team fights, support players can carry lingering regeneration potions to create healing zones. Drop one near your team’s defensive position and anyone inside gets passive healing. It’s expensive but devastating in objective-based modes like Bedwars or faction wars.
Note: Most competitive servers allow regeneration potions, but always check server rules. Some ban certain tiers or limit potion stacking.
Advanced Tips and Optimization Strategies
Once you’ve mastered basic brewing, these advanced tactics maximize efficiency and effectiveness.
Combining Regeneration with Other Potions
Potion stacking is where true power lies. Regeneration works multiplicatively with other buffs:
- Regeneration II + Strength II + Speed II: The classic boss fight loadout. Strength boosts damage, speed improves dodging and positioning, regeneration keeps you alive.
- Regeneration I (extended) + Night Vision + Water Breathing: The explorer’s trinity. Covers healing, visibility, and underwater breathing for extended expeditions.
- Regeneration II + Resistance + Absorption (golden apple): The tank setup. Near-invincible for short bursts, ideal for Wither fights or raid wave finales.
Remember: You can have multiple effects active simultaneously. Don’t be afraid to chug 3-4 potions before a major fight, inventory management is part of the skill ceiling.
Efficient Farming and Bulk Brewing Methods
Once you need regeneration potions in bulk (for multiplayer, long campaigns, or stockpiling), optimize your workflow:
Ingredient farming:
- Build a dedicated ghast farm in the Nether (check community designs on Nexus Mods for automated versions using mod packs).
- Automate nether wart farms with observers and pistons (Java) or manual large-scale farms (Bedrock).
- Keep a dedicated blaze farm near a fortress spawner for unlimited powder.
Bulk brewing:
- Brew in batches of 3 (the max per brewing stand).
- Use multiple brewing stands side-by-side for parallel processing. Three stands = 9 potions per cycle.
- Pre-craft all awkward potions in one session, then switch to specific effects. Batch processing saves time.
- Store finished potions in labeled chests by type: Regeneration I, Regeneration II, Extended, Splash, etc.
Experienced players maintain a “potion wall” in their base, a dedicated storage area with clearly marked sections for every potion type. Makes grabbing the right loadout before adventures trivial.
For players interested in broader potion strategies, detailed guides on managing potion inventories can help optimize your entire brewing operation.
Common Mistakes to Avoid When Brewing
Even veteran players mess up brewing occasionally. Here are the most frequent errors:
Skipping the awkward potion step. You can’t add ghast tears directly to water bottles. Always brew nether wart first.
Using glowstone and redstone together. They cancel each other out. Decide which modifier you want before applying either.
Forgetting blaze powder fuel. The brewing stand won’t work without it. Always keep spare powder in nearby chests.
Applying gunpowder before modifiers. Convert to splash after upgrading to Regeneration II or extending duration. Order matters.
Overestimating splash potion effectiveness. Splash versions give 75% of the effect. Budget for that when planning healing output.
Not carrying backup potions. Regeneration can’t outheal massive burst damage. Always bring instant health potions as emergency backup.
Brewing in unsafe locations. Getting killed while brewing in the Nether or near mobs means losing ingredients. Build a secure brewing room in your base.
Ignoring potion duration in combat. Regeneration I lasts 45 seconds. If a boss fight goes longer, you need a second dose. Plan accordingly.
Double-check recipes before committing rare ingredients like ghast tears. One misclick wastes 10+ minutes of farming.
Conclusion
Mastering regeneration potions transforms Minecraft survival and combat from reactive scrambling to calculated strategy. Whether you’re diving into ancient cities with extended Regeneration I, face-tanking the Wither with Regeneration II, or supporting teammates with splash potions in PvP, understanding the mechanics and modifications gives you a massive edge.
The brewing process isn’t complicated once you’ve run through it a few times, but ingredient farming, especially ghast tears, requires dedication. Set up proper Nether infrastructure early, automate what you can, and always keep a few regeneration potions in your hotbar.
Next time you’re staring down a boss or about to explore a particularly dangerous biome, you’ll know exactly which potion to brew and when to use it. That’s the difference between respawning at your bed and walking away victorious.